windows下使用certify申请SSL证书配置https访问
certbot 已停止windows维护(虽然目前官方仍在更新),推荐使用 **Certify the Web (Certify)**工具来管理 SSL 证书。以下是 Certify 的详细使用指南,适用于 Windows 服务器(如果是 Linux,建议仍用 certbot 或 acme.sh)。
1. Certify the Web 简介
- 适用平台:Windows(IIS / 其他 Web 服务器)
- 功能:
- 自动申请 Let’s Encrypt 证书(免费)。
- 支持 通配符证书(Wildcard SSL)。
- 自动续期(无需手动操作)。
- 支持 DNS API 验证(如阿里云DNS、Cloudflare等)。
2. 安装 Certify the Web
下载与安装
- 访问官网:Certify the Web
- 下载并安装 Certify The Web(支持 Windows Server 2012+)。
3. 配置 Certify
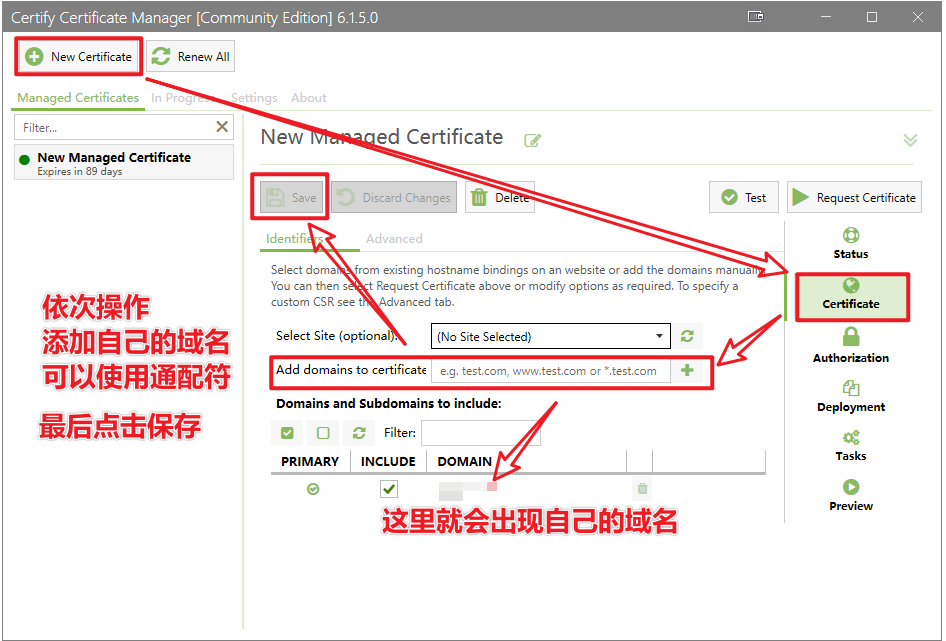
新建证书
配置验证方式
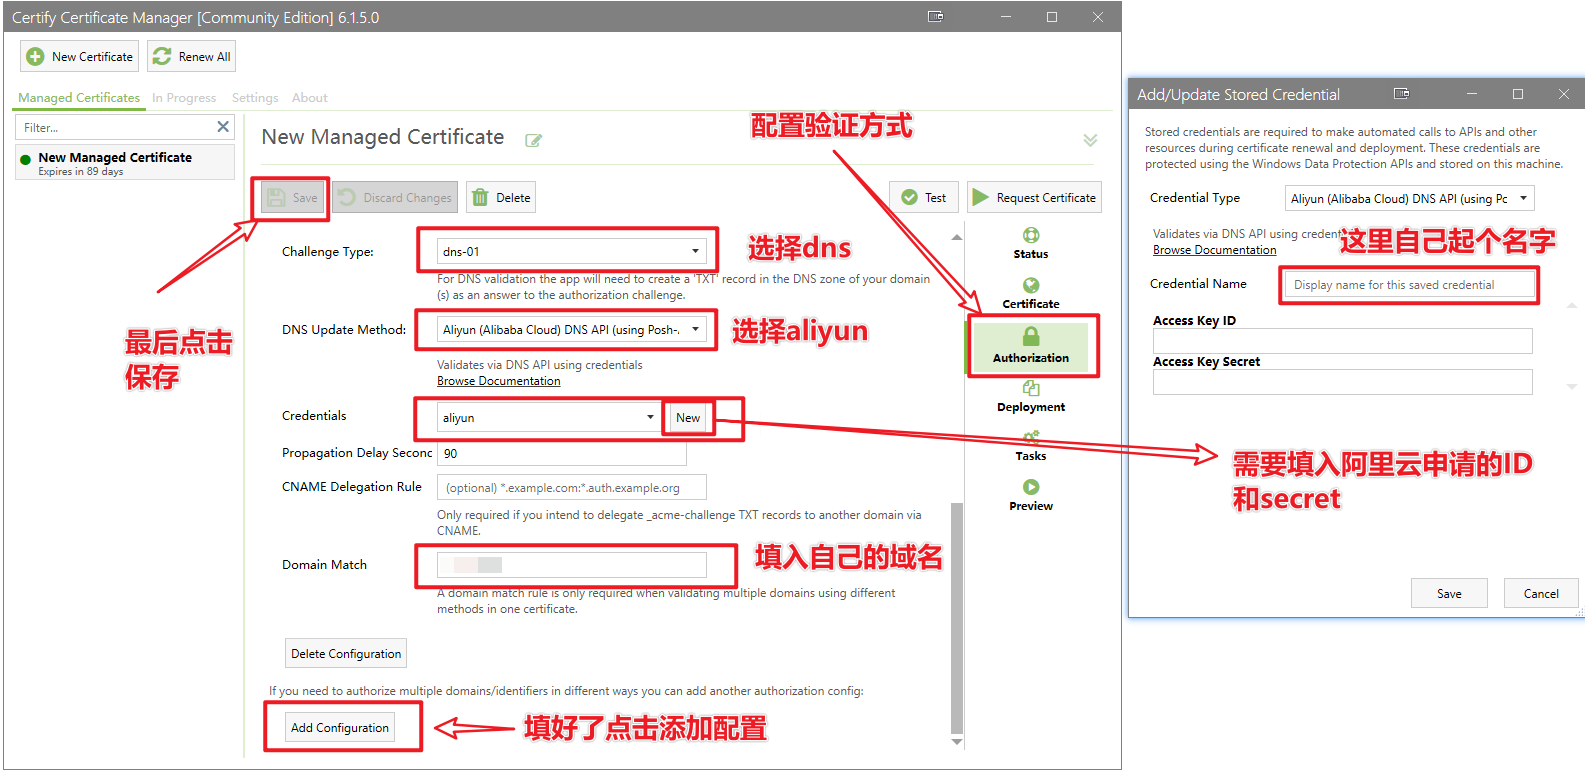
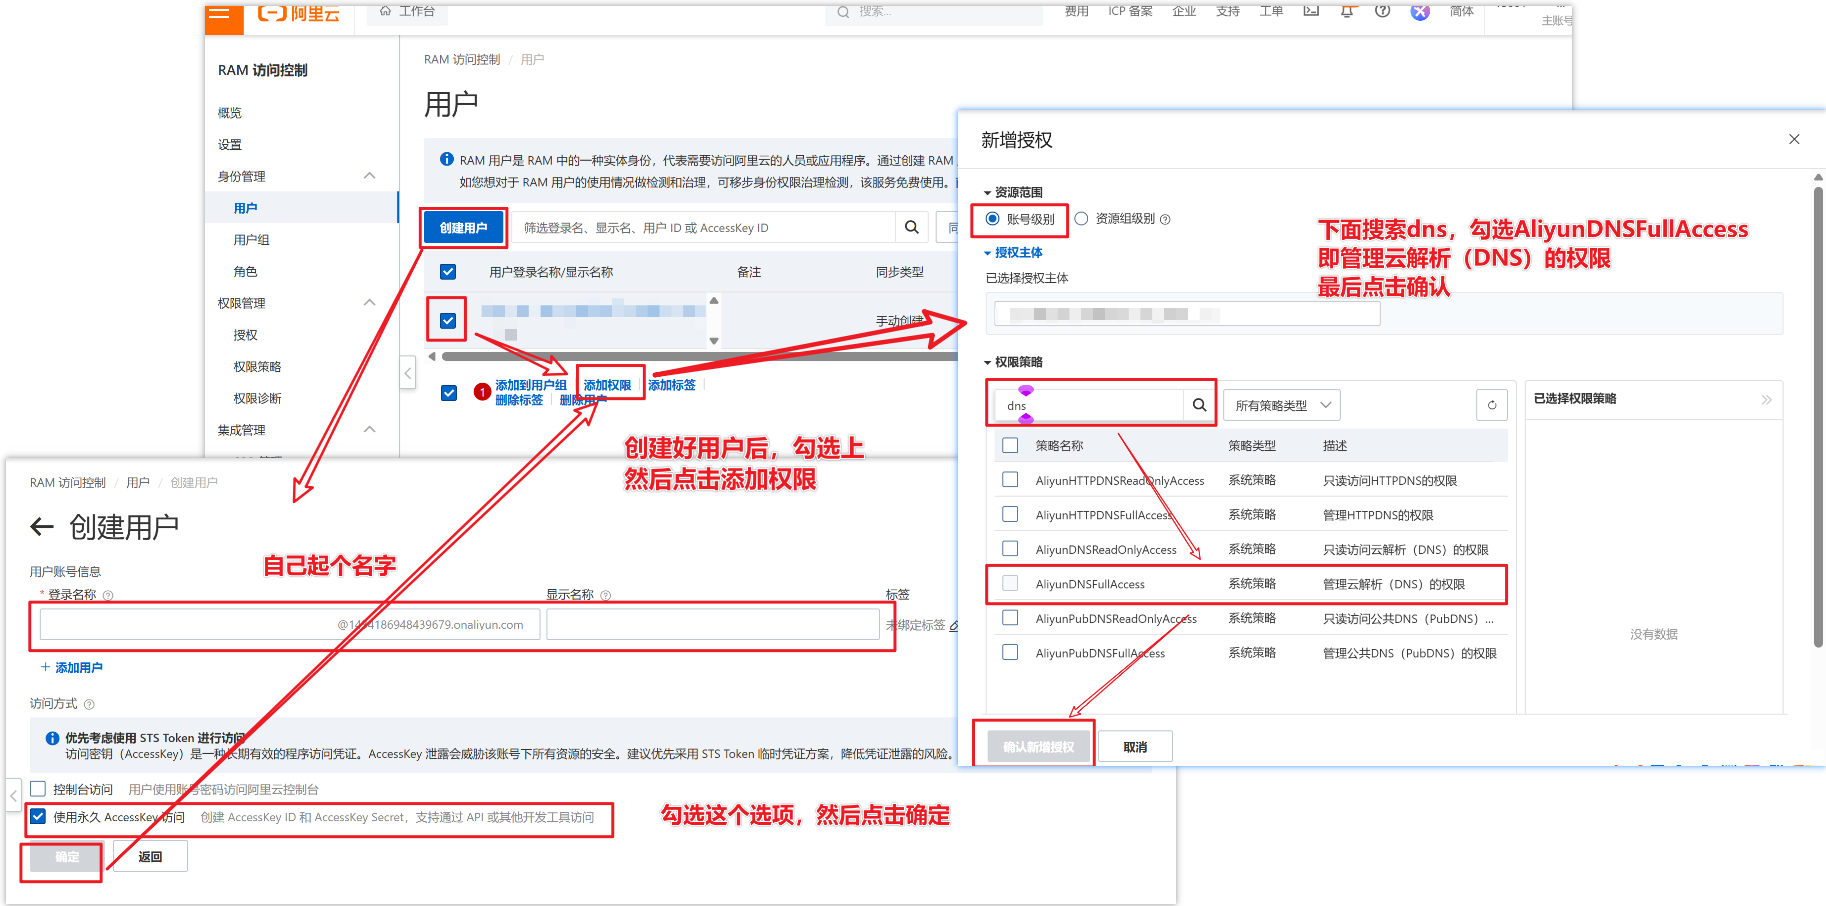
申请DNS Access Key
- 登录 阿里云RAM控制台。
- 创建 用户,赋予
AliyunDNSFullAccess权限。 - 在 Certify 中配置 AccessKey ID 和 AccessKey Secret。
- 最后在Certify界面,点击 Request Certificate ,就能自动完成申请证书了
4. 自动续期
- Certify 默认会 自动续期(证书到期前 30 天)。
5. 在 Nginx 中使用证书
如果后端是 Nginx(非IIS),需导出证书:
-
导出证书:
- 按照下图操作完证书就保存到本地目录了:
cert.pem(证书)privkey.pem(私钥)
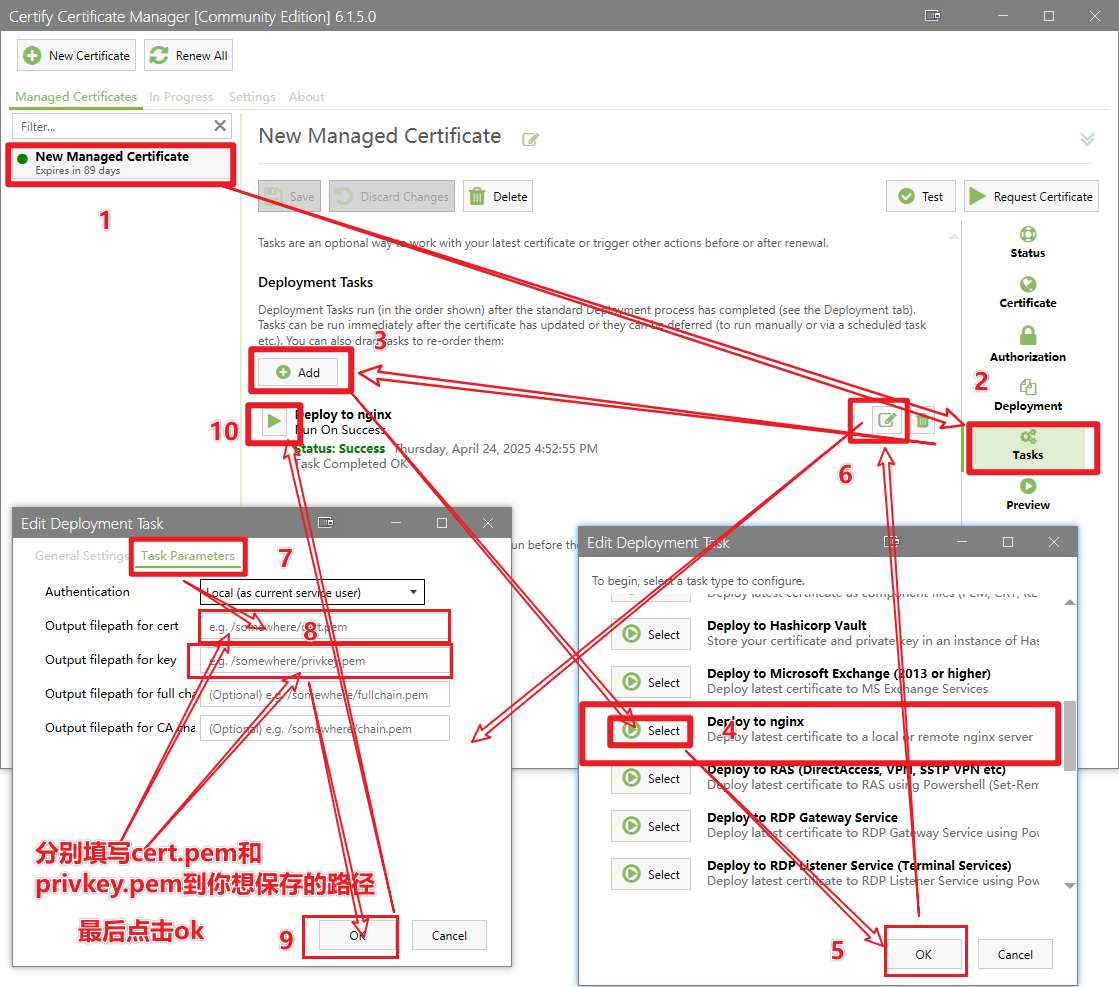
- 按照下图操作完证书就保存到本地目录了:
-
配置 Nginx:简单示例,配置好重启nginx,就可以使用域名访问nginx转发的端口了
1
2
3
4
5
6
7
8
9
10
11
12
server {
listen 443 ssl;
server_name 域名;
ssl_certificate /path/to/cert.pem;
ssl_certificate_key /path/to/privkey.pem;
# 其他配置...
location / {
proxy_pass http://localhost:3000;
}
}
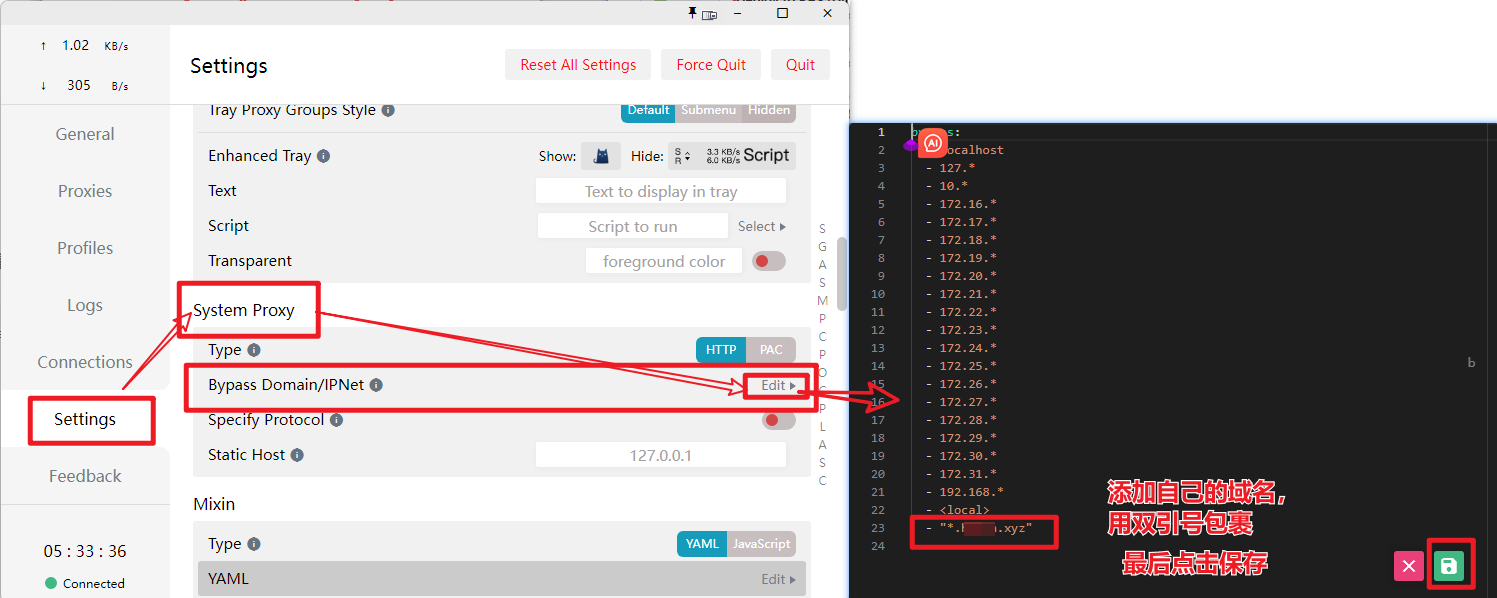
6. 如果本地启用了clash代理,可以配置域名绕过代理